Creating an energy-efficient lighting design begins with a practical question: what makes a lighting design energy efficient? The answer is not simply choosing LED lamps. It involves delivering useful light precisely where people need it, while limiting glare, heat, waste, and unnecessary operating hours. The U.S. Department of Energy reports that LED products use at least 75% less energy than incandescent lighting and can last up to 25 times longer. That difference becomes visible in a real room: fewer replacements, cooler ceilings, and lower electricity demand.
Lighting researcher Peter Boyce describes effective lighting as providing “the right amount of light, in the right place, at the right time.” This principle supports a design that combines efficient luminaires, daylight harvesting, occupancy sensors, dimming, and appropriate colour temperature. The International Energy Agency identifies lighting efficiency as an important opportunity for reducing electricity consumption worldwide. The 2024 Global Status Report for Buildings and Construction also shows why building energy decisions matter, with buildings using roughly 32% of global energy.
Small details matter.
A corridor does not need the same output as a workbench. A window-side zone may require less artificial light during the afternoon. Yet efficiency should not sacrifice visual comfort, accessibility, or safety. That balance is sometimes imperfect. Sensors may be poorly commissioned. Users may override controls. A technically efficient system can still fail in daily practice. This guide explores measurable strategies, realistic controls, and human behaviour, helping designers create lighting that performs efficiently beyond the drawing board.
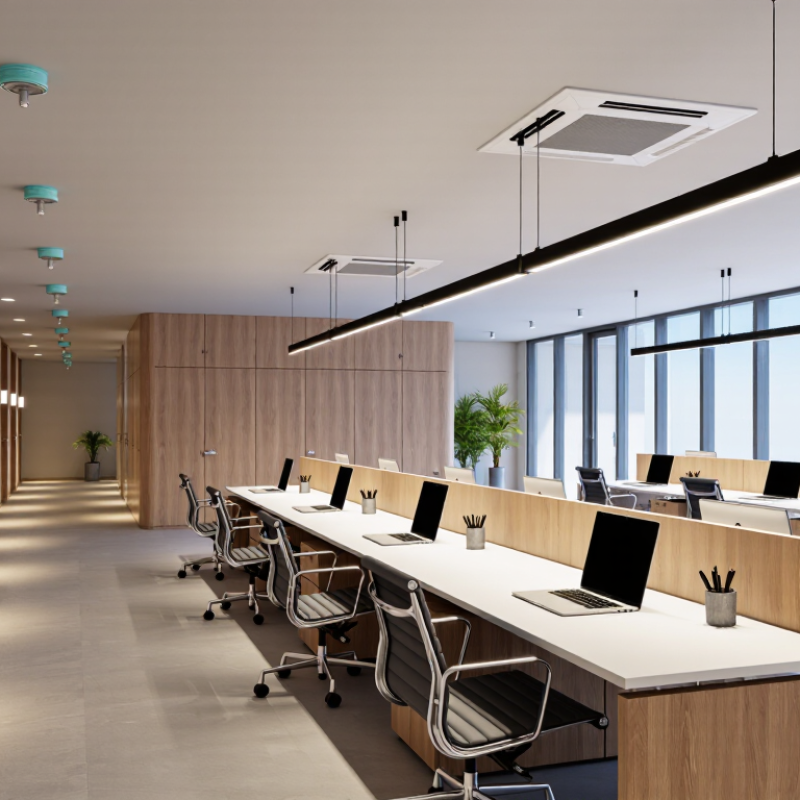
An energy-efficient lighting design begins with the room, not the fixture. Walk through the space at different times of day. Record window direction, ceiling height, surface colors, task locations, and shadows from furniture. A desk beside a bright window needs different support than a corridor with no daylight. Measure existing illuminance with a calibrated light meter, rather than trusting visual judgment alone. It is easy to overlight a room.
Define the visual task before selecting equipment. Reading, food preparation, circulation, and screen work require different light levels, contrast, and glare control. The Illuminating Engineering Society recommends task-based criteria instead of one uniform target for every space. The U.S. Department of Energy reports that light-emitting diode systems can use at least 75% less energy than incandescent lighting. That figure matters only when the design avoids unnecessary output and operating hours. More light is not automatically better.
Study daylight availability across seasons. The International Energy Agency and United Nations Environment Programme reported that lighting represented about 15% of global electricity consumption in 2018. A well-positioned daylight zone can reduce electric lighting demand, but only with practical controls. Consider occupancy patterns, dimming behavior, maintenance access, and user comfort. Test one room before repeating the design. My own early layouts often ignored reflected glare from pale desks. That mistake looked acceptable on paper. It was not acceptable at the screen. Record assumptions, revisit them, and allow measured results to challenge the first design.
Room conditions determine useful light levels. Check windows, ceiling height, wall colors, furniture, and shadows. A desk near a window needs different support than a dark corridor. Walk through the space at different times. Test one room.
Define the visual task before choosing equipment. Reading, cooking, walking, and screen work need different brightness and glare control. Measure illuminance with a calibrated light meter. Visual judgment can mislead you.
No. Excessive brightness can create glare, screen reflections, and wasted electricity. More light is not automatically better. Compare measured lux levels with user comfort. Reduce output when the task allows it.
Position lighting zones near windows and allow fixtures to dim during bright periods. Study daylight in different seasons. Afternoon sunlight may brighten a desk, while winter conditions may require support. Controls must respond reliably.
Choose fixtures that direct light toward desks, counters, and walkways. Avoid scattering brightness across empty ceilings. Check lumen output, color temperature, glare control, and color rendering. Energy labels alone are not enough.
Occupancy sensors can switch off lights in storage rooms and unused areas. Daylight sensors can dim fixtures near windows. Separate zones prevent one empty corner from lighting an entire floor. Timing needs adjustment.
Shielded fixtures can reduce reflections on screens. Check the desk surface, monitor angle, and nearby windows. Pale desks may reflect surprising glare. My earlier layouts missed this problem. The drawings looked acceptable, but the screens did not.
Compare operating hours, measured lux levels, and user feedback. Reposition fixtures when illumination is uneven. Test actual conditions before repeating the design elsewhere. Measurements should challenge assumptions. Adjust, then measure again.
An energy-efficient lighting design begins with a careful assessment of the space, its activities, occupancy patterns, and required light levels. The key question is what makes a lighting design energy efficient: using only the light needed, selecting efficient fixtures and lamps, and applying controls that prevent unnecessary operation. A well-planned system combines appropriate equipment with a balanced layout, reducing glare, shadows, and over-lighting while supporting comfort and productivity.
Daylight should be incorporated whenever practical, supported by dimming, occupancy sensors, scheduling, and other automated controls. These strategies allow lighting output to respond to changing conditions and room usage. During installation, fixtures should be positioned accurately, controls configured correctly, and the entire system tested for performance and user comfort. Regular cleaning, inspections, and maintenance preserve efficiency over time, helping the lighting system deliver reliable illumination while reducing energy consumption and operating costs.

 Layr Light